# Configuration and Access
After installation, you need to make some simple configurations.
# Configure Domain Name
If you already have a real domain name, you need to configure it to import its traffic into the Ingress controller of the Kubernetes cluster, for success access to the Ingress domain name configured in the cluster.
If not, you need to add the following URL to the etc/ hosts file and replace the example IP with the Ingress controller IP of the Kubernetes cluster.
For example, if the Ingress controller IP of Kubernetes cluster is 10.0.0.1, and the domain name is erda.io, then add the following information to the /etc/hosts file:
10.0.0.1 erda.io
10.0.0.1 collector.erda.io
10.0.0.1 openapi.erda.io
10.0.0.1 uc.erda.io
# Access Erda
Through the configured domain name, access Erda, register and log in.
Follow the guide to create an Organization.
![]()
After organization creation, import clusters and set node labels.
Import the Kubernetes cluster where Erda is deployed.
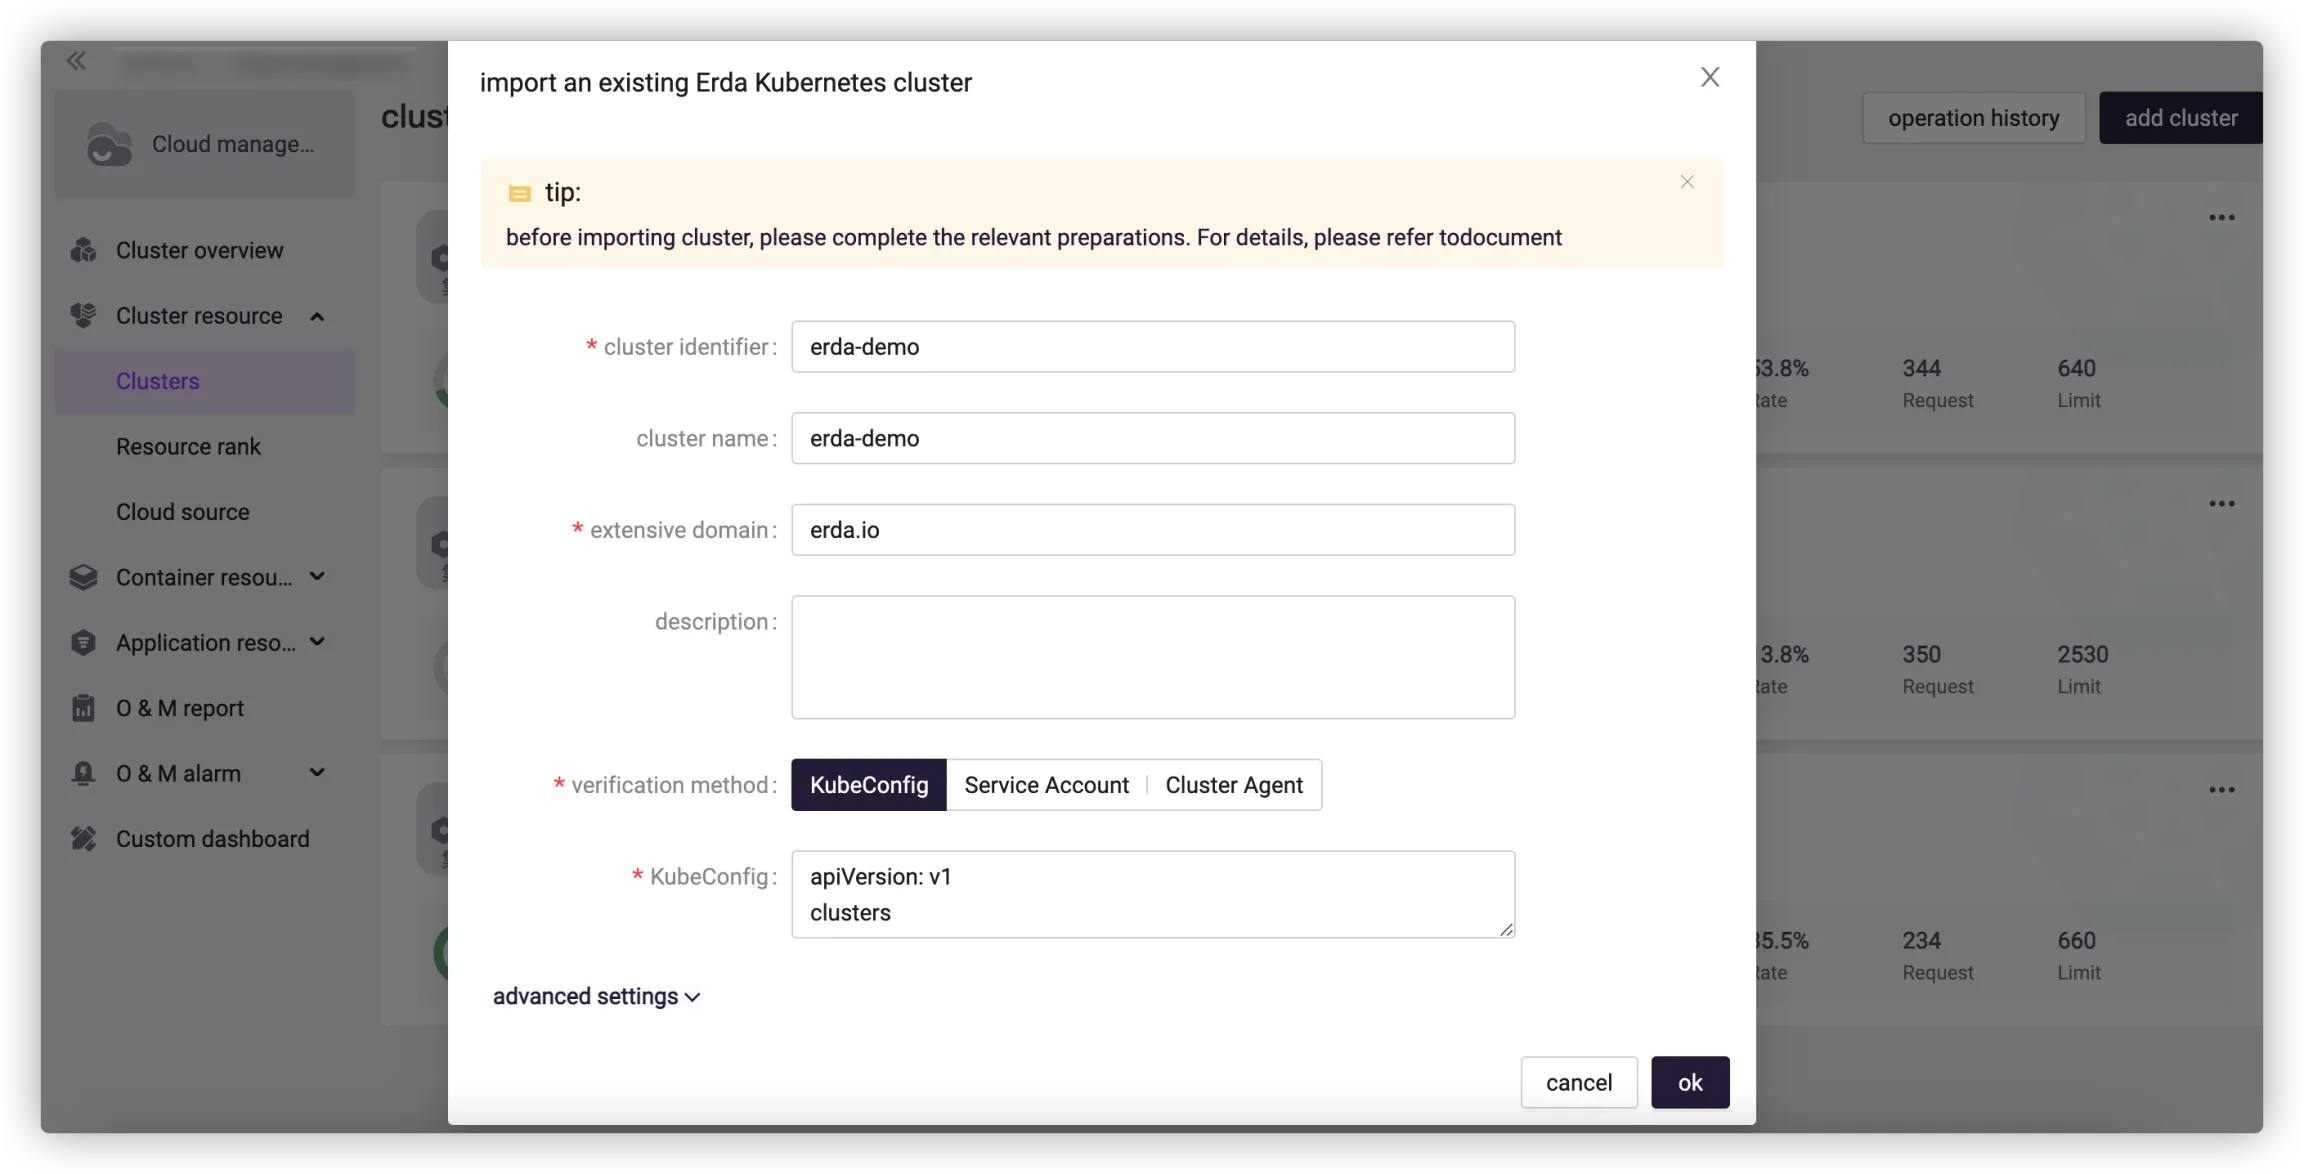
- Go to Cloud Management > Cluster Resource > Clusters and choose Import an existing Erda Kubernetes cluster.
![]()
- Complete cluster configuration. For example, set cluster identifier as local-cluster, domain name as erda.io, and authentication method as Kubeconfig.
![]()
Tips


The cluster identifier and domain name must be consistent with the configuration specified during installation, otherwise Erda functions may be unavailable. :::
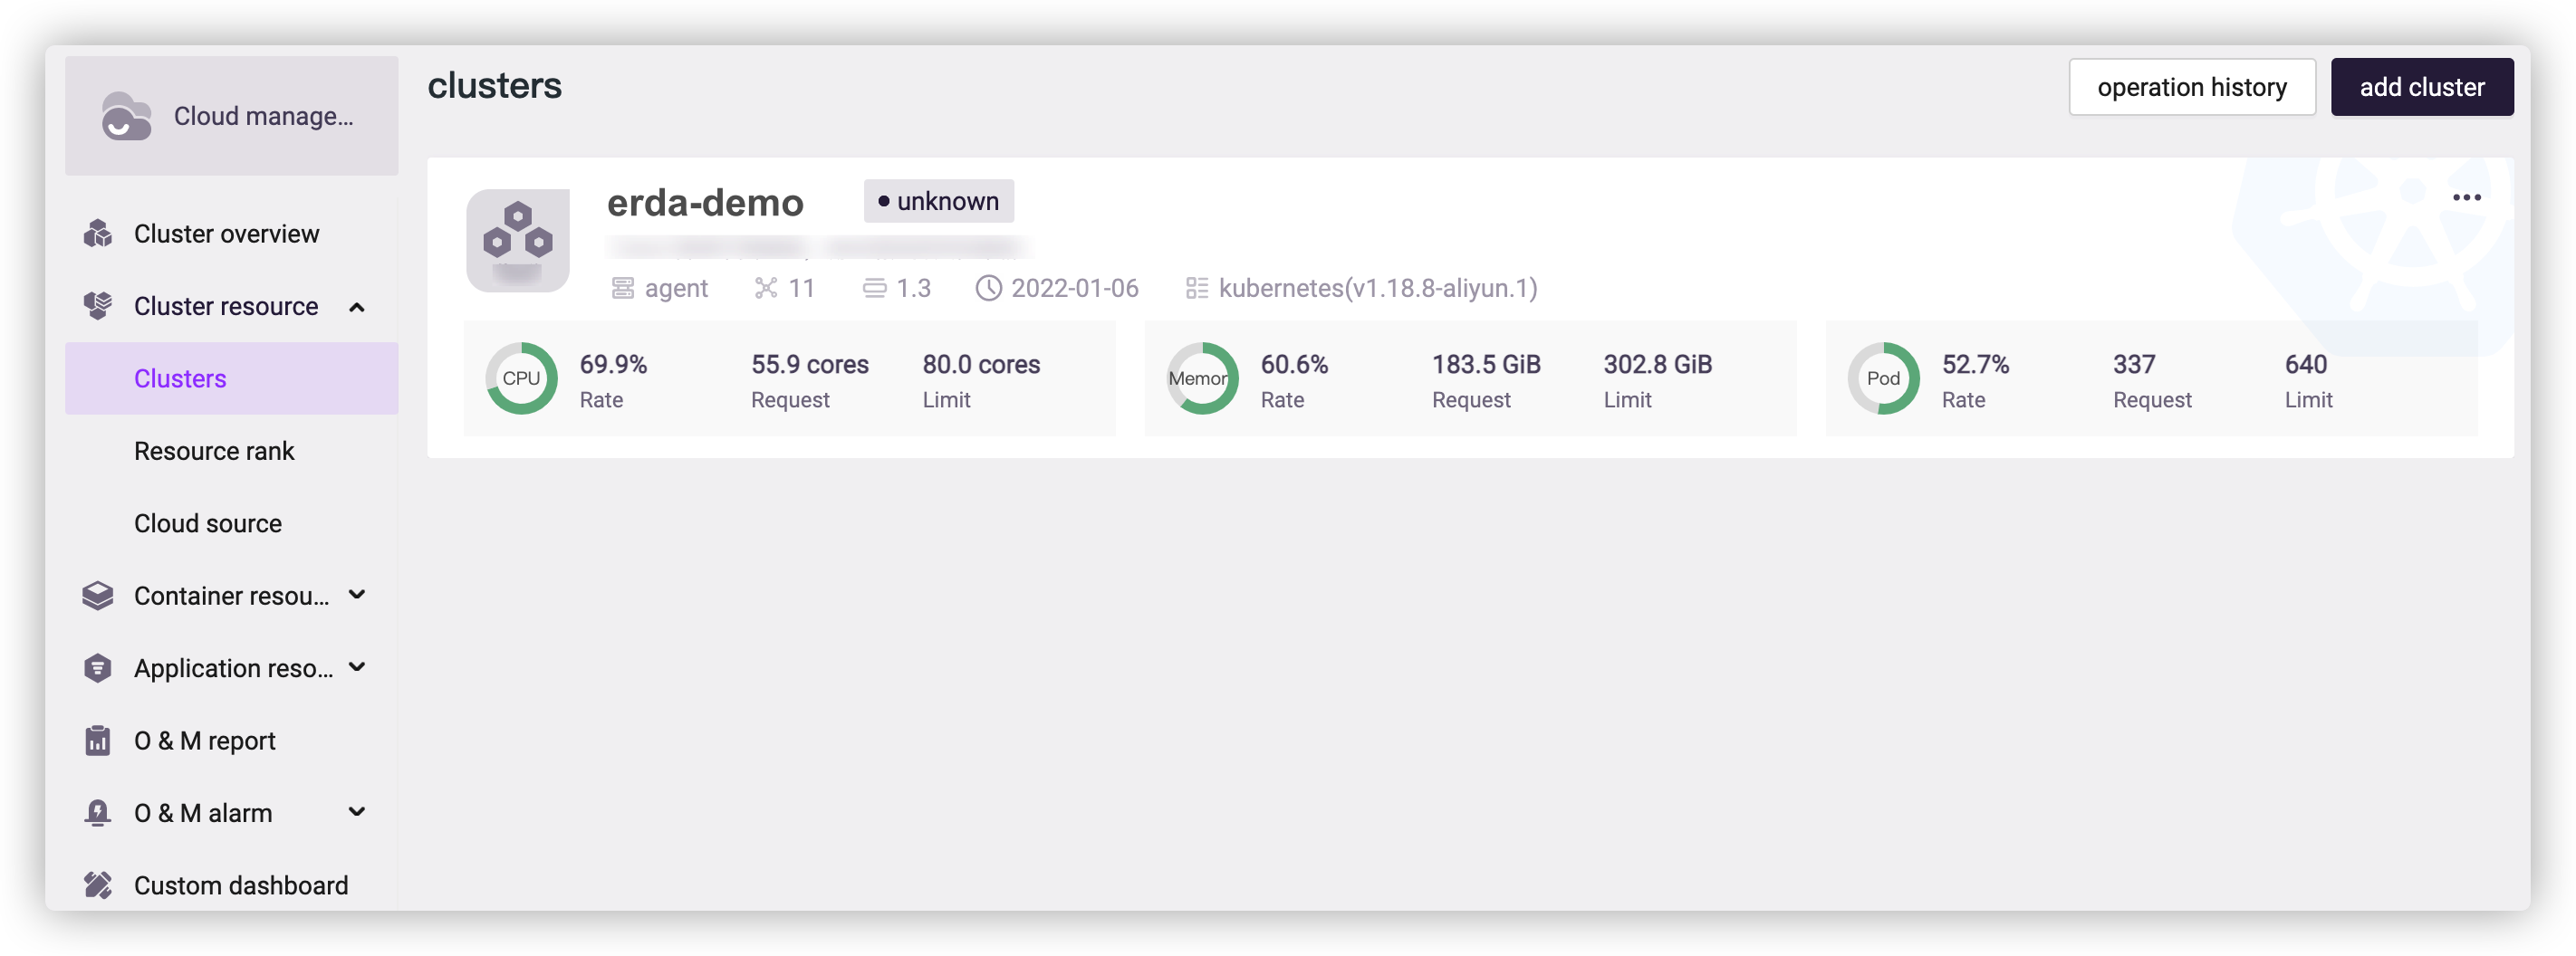
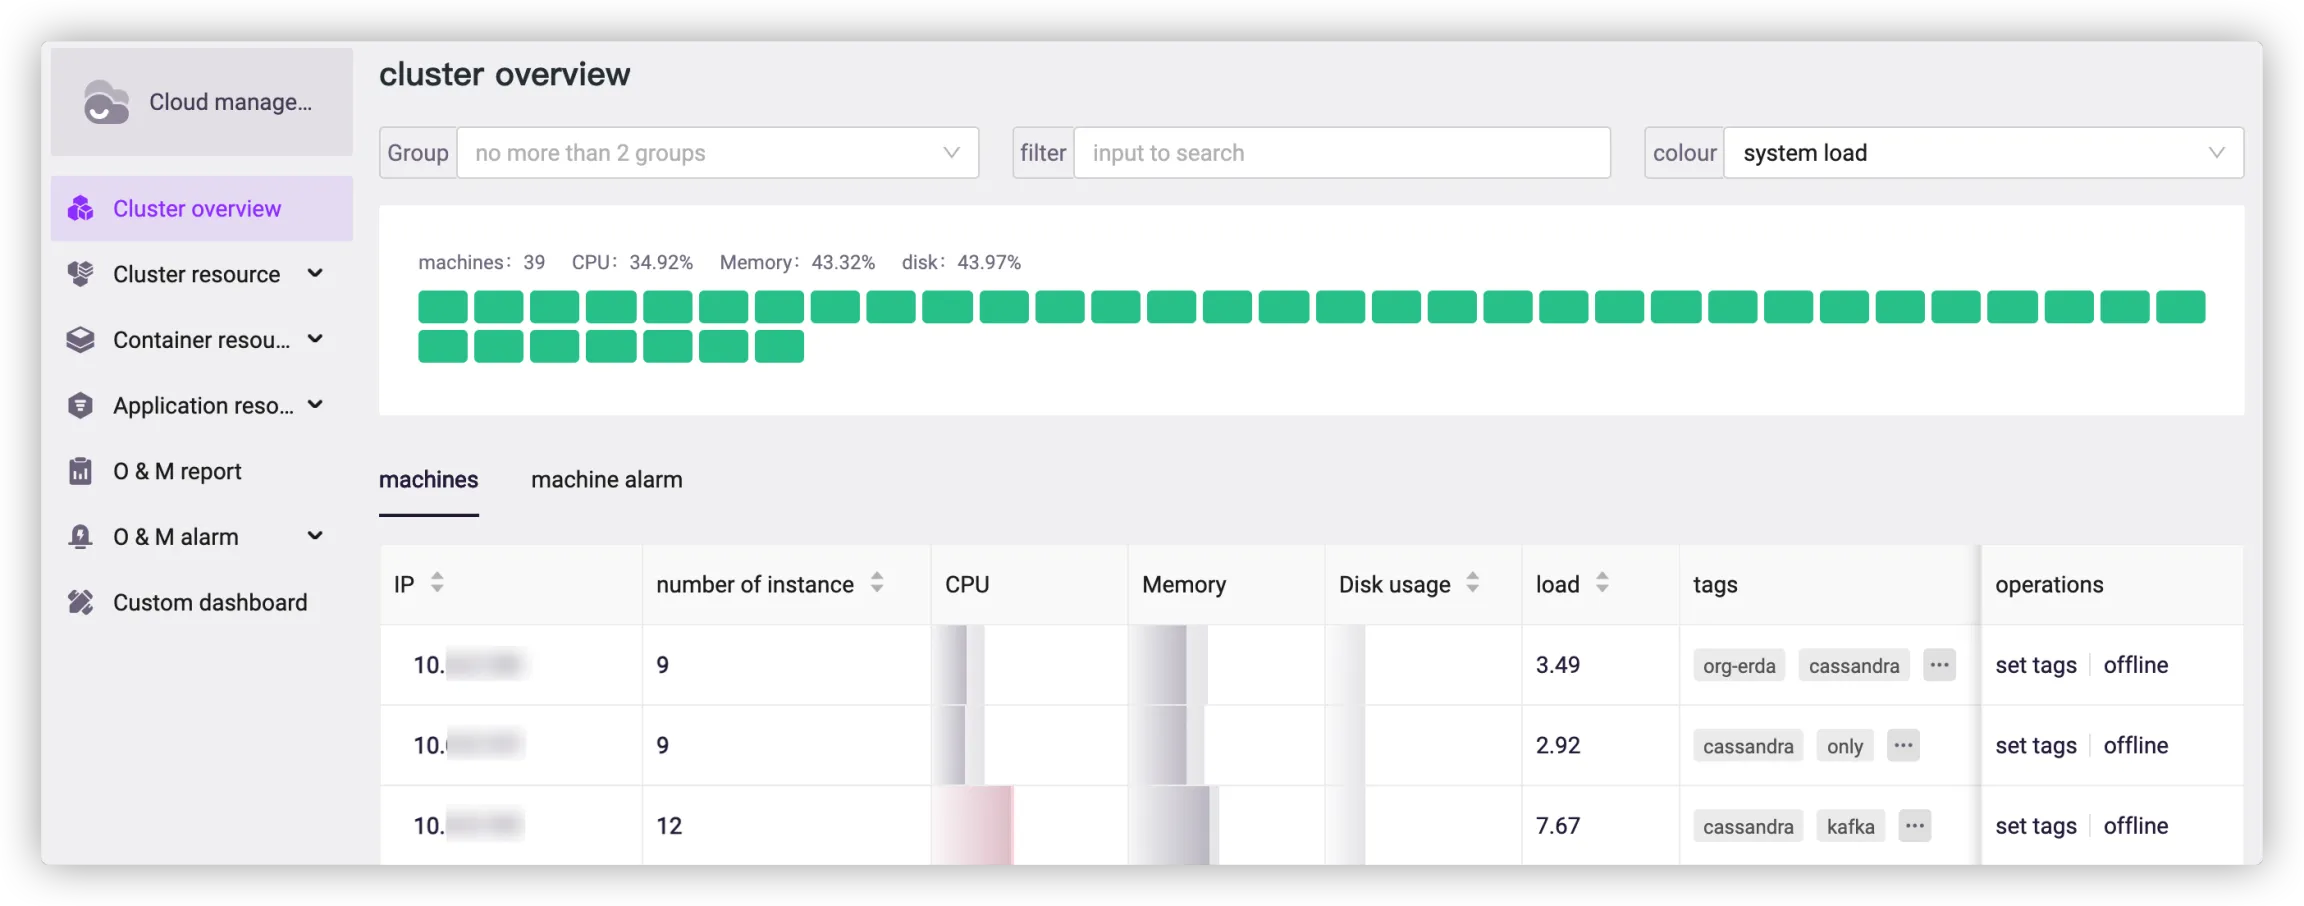
* After cluster importing, you can view cluster status on the **Clusters** page, and view monitoring information on the **Cluster Overview** page.
Set node tags for scheduling. For details, see Node Tags.
![]()
Create your first project according to the guide and start your journey of Erda.
![]()
