# 基于 Spring Cloud 微服务框架的应用开发治理
本文将以 Spring Cloud 为例,讲述 Erda 中构建微服务架构应用的最佳实践。
微服务架构相较于传统的单体应用,最大的变化在于服务拆分,具体来说是根据业务领域进行业务组件拆分,例如采用领域驱动设计(DDD),按照业务领域划分为多个微服务,服务之间相互协同完成业务功能。
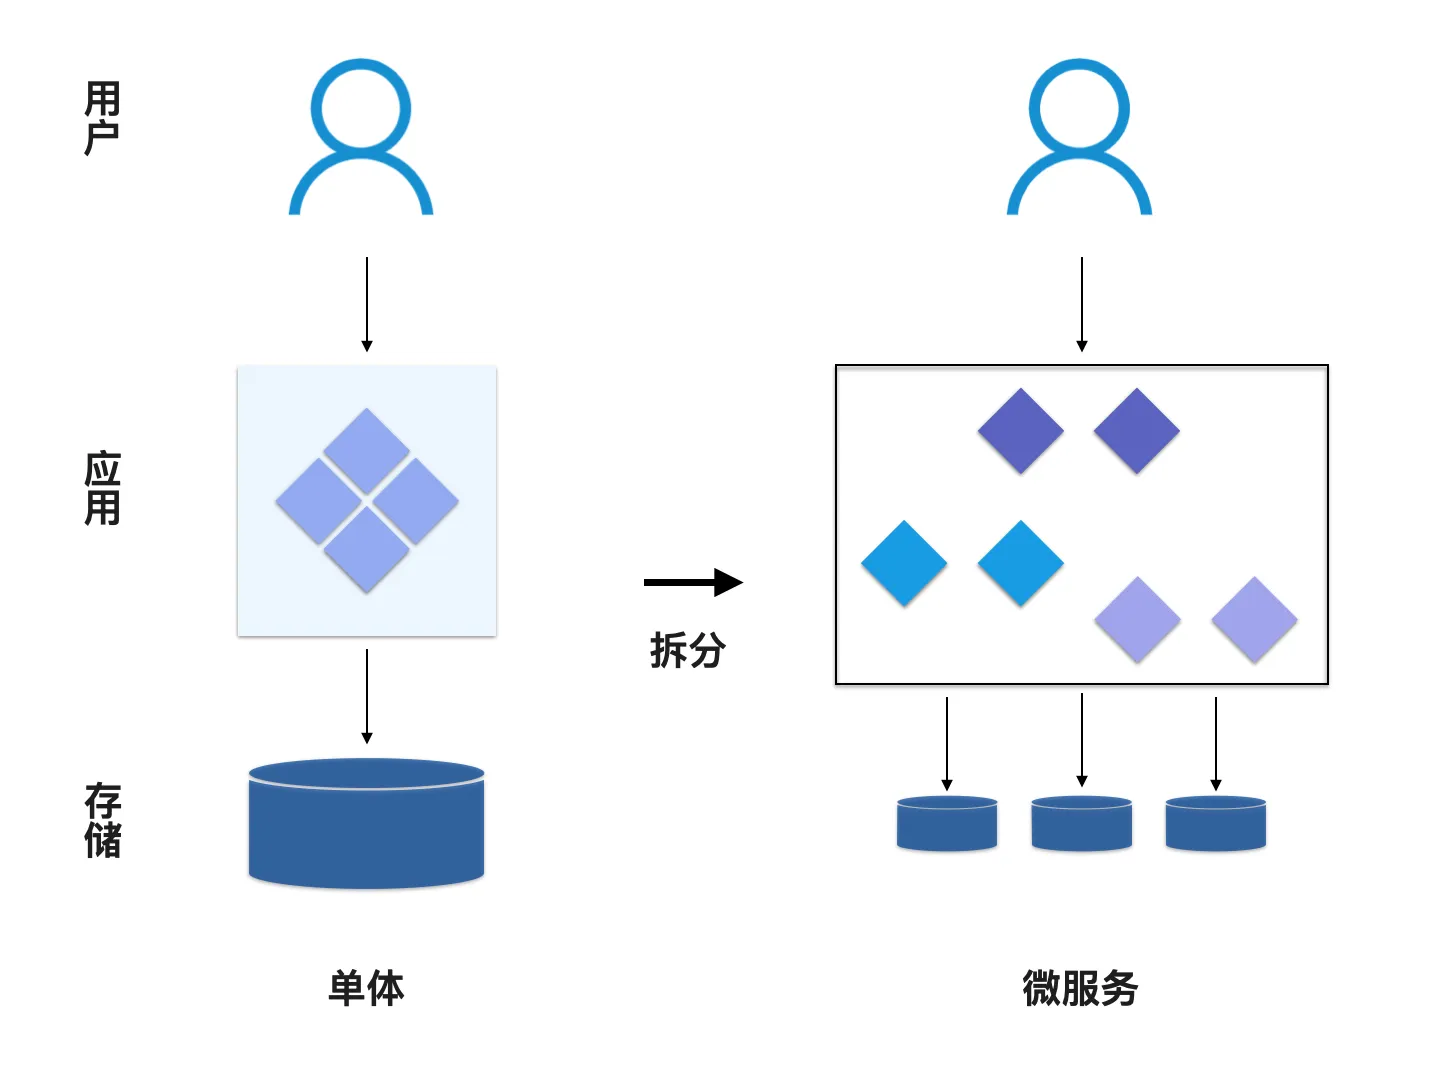
微服务架构解决了众多单体应用的问题,同时也增加了架构的复杂性。下文将针对技术架构的改变,介绍如何在 Erda 上完成微服务应用的研发和治理,主要包括以下内容:
- 服务的发现和调用
- 服务的配置集中管理
- 服务的 API 开放和测试
- 服务的可观测治理
提示
微服务应用天然属于分布式应用,其涉及的分布式架构解决方案,例如分布式缓存、队列、事务等,本文不作讨论。
# 微服务设计
首先创建一个微服务项目名为 bestpractice(分配 4 核 CPU 和 8 GB 内存),并创建微服务应用 echo-web 和 echo-service(应用类型为 业务应用,仓库选择 使用内部仓库)。
echo-web 模拟业务聚合层,对内调用 echo-service 完成服务功能,对外通过 Erda 的 API 网关提供 Open API,其功能包括:
- 提供 /api/content API 调用 echo-service 实现对 content 资源的增删改查。
- 提供 /api/error API 调用 echo-service 制造异常。
echo-service 模拟单一业务领域服务层,处理领域内业务逻辑,并完成持久化,其功能包括:
- 提供 /echo/content API 实现对 content 资源的增删改查。
- 提供 /echo/error API 制造异常。
echo-web 和 echo-service 通过 Erda 的微服务组件注册中心实现服务接口的注册与发现,通过微服务组件配置中心实现配置统一管理和热加载。
# API 设计
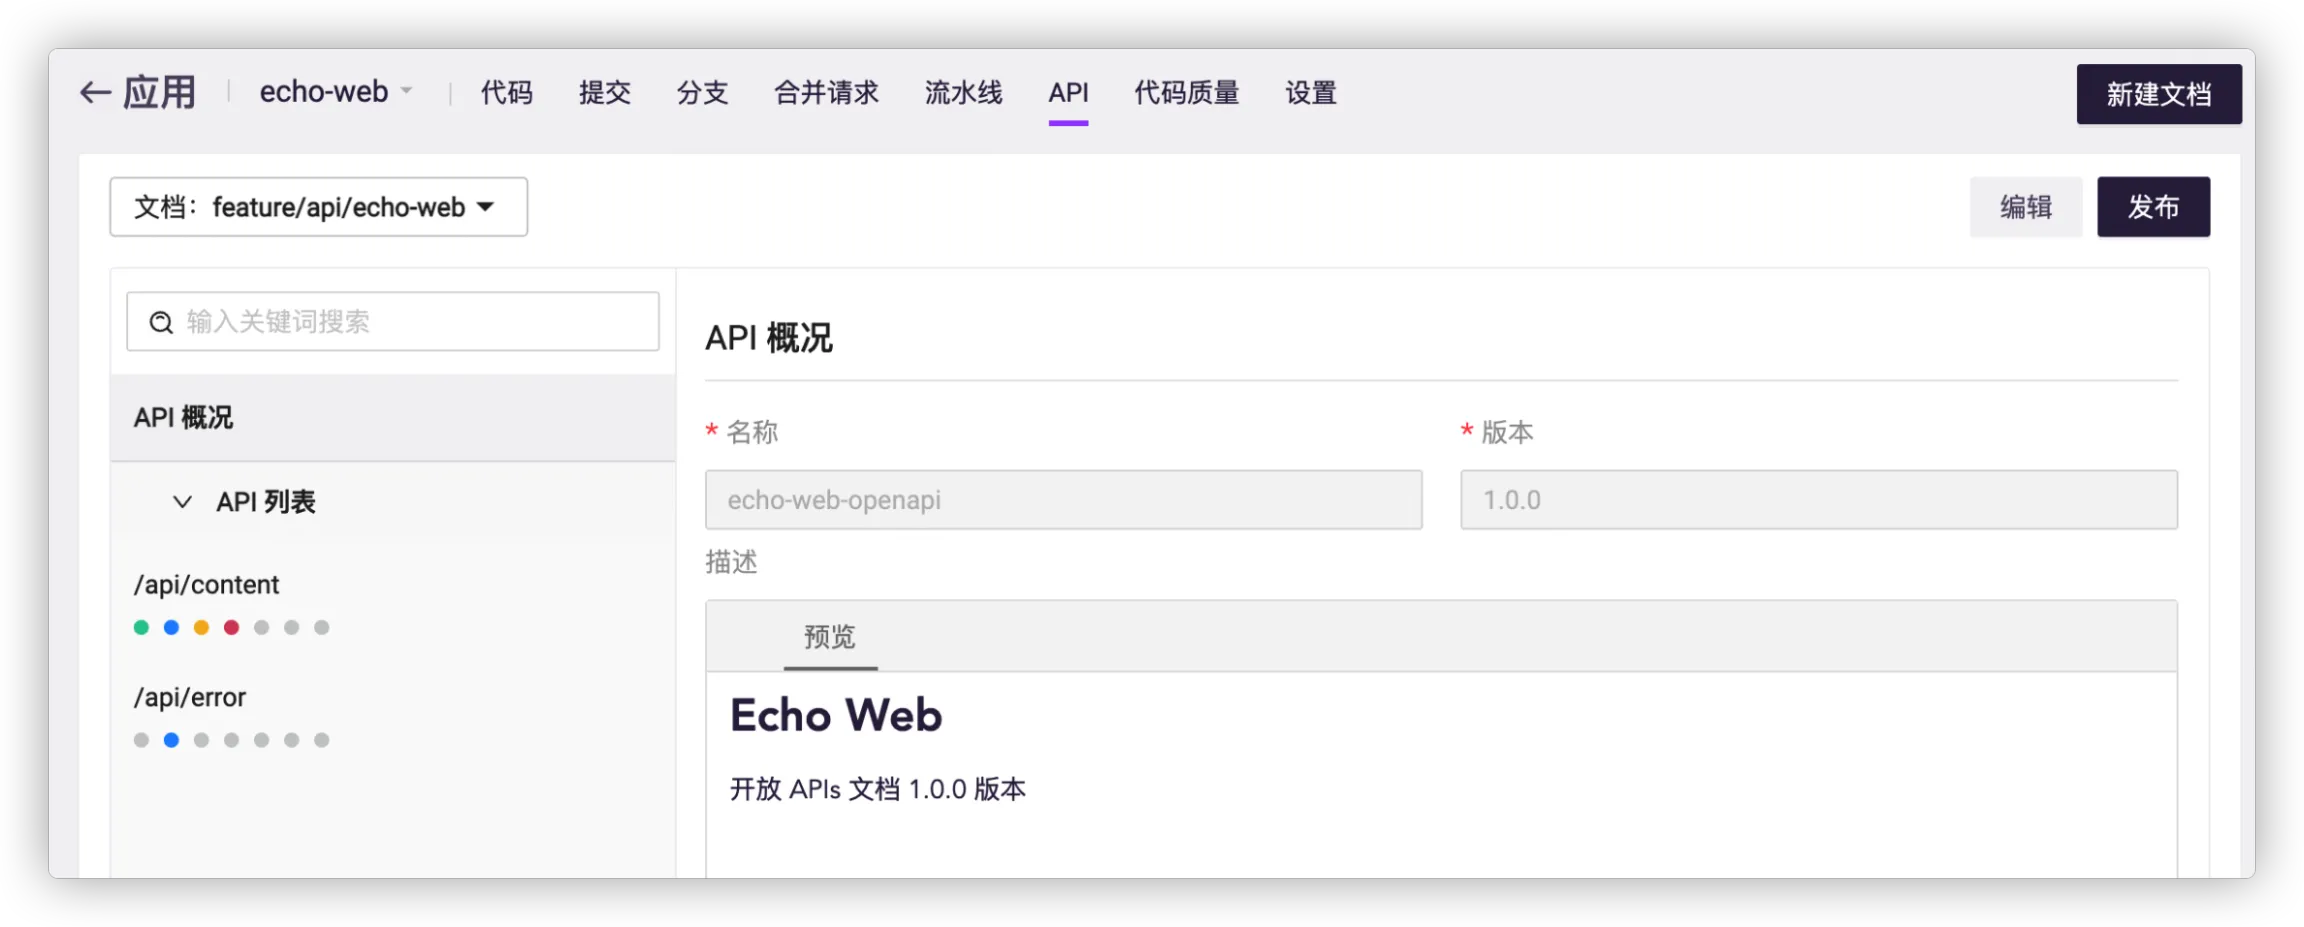
进入 echo-web 应用 > API > 新建文档,选择分支 feature/api,名称为 echo-web。
提示
echo-web 为 Service 名称,与 dice.yml 中的服务名称保持一致。
# 数据类型
content: 参数名称 “content”, 类型 “String”
ContentRequest: 参数名称 “ContentRequest”, 类型 “Object”, 其参数引用类型 “content”
ContentResponse: 参数名称 “ContentResponse”, 类型 “Object”, 其参数引用类型 “content”
# APIs
echo web 应用 API
1. /api/content
	1. Method: GET
		Response
			MediaType: application/json
			类型: ContentResponse
	2. Method: PUT
		Body
			MediaType: application/json
			类型: ContentRequest
	3. Method: POST
		Body
			MediaType: application/json
			类型: ContentRequest
	4. Method: DELETE
		Response
			MediaType: application/json
			类型:Object
				参数名称: deleted, 类型: Boolean
2. /api/error
	1. Method:POST
		Body
			MediaType: application/json
			类型:Object
				参数名称: type, 类型: String
点击 发布,填写 API 名称为 Echo 应用 API,API ID 为 echo-web,发布版本为 1.0.0。
![]()
echo service 应用 API
1. /echo/content
	1. Method: GET
		Response
			MediaType: application/json
			类型: ContentResponse
	2. Method: PUT
		Body
			MediaType: application/json
			类型: ContentRequest
	3. Method: POST
		Body
			MediaType: application/json
			类型: ContentRequest
	4. Method: DELETE
		Response
			MediaType: application/json
			类型:Object
				参数名称: deleted, 类型: Boolean
1. /echo/error
	1. Method: POST
		Body
			MediaType: application/json
			类型:Object
				参数名称: type, 类型: String
进入 DevOps 平台 > API 管理 > API 集市 查看、管理 API。
![]()
提示
- 发布后的 API 文档默认为 私有,仅关联项目应用下的成员可查看。
- 若为企业级 Open API,可设置为 共有,便于组织下所有用户查看。

# 应用开发
# echo service 应用
# 基于 Spring Boot 开发框架创建应用
使用 IDEA 创建 Maven 项目(Java 1.8)并配置 Spring Boot 框架,目录结构如下:
├── pom.xml
└── src
    ├── main
    │   ├── java/io/terminus/erda/bestpractice/echo
    │   │                                      ├── Application.java
    │   │                                      └── controller
    │   │                                          └── DefaultController.java
    │   └── resources
    │       └── application.yml
    └── test
        └── java
编辑 pom.xml 文件:
<?xml version="1.0" encoding="UTF-8"?>
<project xmlns="http://maven.apache.org/POM/4.0.0"
         xmlns:xsi="http://www.w3.org/2001/XMLSchema-instance"
         xsi:schemaLocation="http://maven.apache.org/POM/4.0.0 http://maven.apache.org/xsd/maven-4.0.0.xsd">
    <modelVersion>4.0.0</modelVersion>

    <groupId>io.terminus.erda.bestpractice.echo</groupId>
    <artifactId>echo-service</artifactId>
    <version>1.0-SNAPSHOT</version>

    <properties>
        <maven.compiler.source>8</maven.compiler.source>
        <maven.compiler.target>8</maven.compiler.target>
    </properties>

    <parent>
        <groupId>org.springframework.boot</groupId>
        <artifactId>spring-boot-starter-parent</artifactId>
        <version>2.1.4.RELEASE</version>
        <relativePath/>
    </parent>

    <dependencies>
        <dependency>
            <groupId>org.springframework.boot</groupId>
            <artifactId>spring-boot-starter-web</artifactId>
        </dependency>
    </dependencies>

    <dependencyManagement>
        <dependencies>
            <dependency>
                <groupId>org.springframework.cloud</groupId>
                <artifactId>spring-cloud-dependencies</artifactId>
                <version>Greenwich.SR1</version>
                <type>pom</type>
                <scope>import</scope>
            </dependency>
        </dependencies>
    </dependencyManagement>

    <build>
        <finalName>echo-service</finalName>
        <plugins>
            <plugin>
                <groupId>org.springframework.boot</groupId>
                <artifactId>spring-boot-maven-plugin</artifactId>
                <configuration>
                    <executable>true</executable>
                    <mainClass>io.terminus.erda.bestpractice.echo.Application</mainClass>
                </configuration>
                <executions>
                    <execution>
                        <goals>
                            <goal>repackage</goal>
                        </goals>
                    </execution>
                </executions>
            </plugin>
        </plugins>
    </build>
</project>
提示
pom.xml 中 build 部分使用 spring-boot-maven-plugin 构建 Fat JAR,并会在后续制品中作为可执行的 JAR 文件使用。
编辑 Application.java 文件:
package io.terminus.erda.bestpractice.echo;

import org.springframework.boot.SpringApplication;
import org.springframework.boot.autoconfigure.SpringBootApplication;

@SpringBootApplication
public class Application {
    public static void main(String[] args) {
        SpringApplication.run(Application.class, args);
    }
}
编辑 DefaultController.java 文件增加健康检查 API:
package io.terminus.erda.bestpractice.echo.controller;

import org.springframework.web.bind.annotation.RequestMapping;
import org.springframework.web.bind.annotation.RequestMethod;
import org.springframework.web.bind.annotation.RestController;

@RestController
@RequestMapping(value = "/api")
public class DefaultController {
    @RequestMapping(value = "/healthy", method = RequestMethod.GET)
    public boolean healthy() {
        return true;
    }
}
提示
健康检查 API 用于 dice.yml 中,提供给 Kubernetes 进行 liveness 和 readiness 检查,需保证其返回 200 时服务健康可用。
# 关联 Erda Git 远程仓库并推送代码
git remote add erda https://erda.cloud/trial/dop/bestpractice/echo-web
git push -u erda --all
git push -u erda --tags
# echo web 应用
参考上文 echo service 应用的开发过程,完成以下内容:
- 基于 Spring Boot 开发框架创建应用。
- 关联 Erda Git 远程仓库并推送代码。
# CI/CD 流水线
下文以 echo-service 应用为例编排流水线,可供 echo-web 应用参考。
# pipeline.yml
进入 echo-service 应用新建流水线,选择 java-boot-maven-erda 模板,切换代码模式开始编辑:
...
              dice.yml中的服务名:
                cmd: java -jar /target/jar包的名称
                copys:
                  - ${java-build:OUTPUT:buildPath}/target/jar包的名称:/target/jar包的名称
                image: registry.cn-hangzhou.aliyuncs.com/terminus/terminus-openjdk:v11.0.6
...
将模版中上述部分修改为:
              echo-service:
                cmd: java ${java-build:OUTPUT:JAVA_OPTS} -jar /target/echo-service
                copys:
                  - ${java-build:OUTPUT:buildPath}/target/echo-service.jar:/target/echo-service.jar
                  - ${java-build:OUTPUT:buildPath}/spot-agent:/
                image: registry.cn-hangzhou.aliyuncs.com/terminus/terminus-openjdk:v11.0.6
提示
pipeline.yml 中用于替换 JAR 包的名称需与 echo-service 应用 pom.xml 的 build.finalName 保持一致,用于替换 dice.yml 中的服务名需与 dice.yml 保持一致。
# dice.yml
在代码仓库添加 dice.yml 文件并进行编辑,新增节点后按照图示填写配置:

提示
- dice.yml 中的服务名需与 pipeline.yml 保持一致。
- 健康检查端口需与应用监听的端口保持一致,Spring Boot 框架内置的 Tomcat 服务器默认监听 8080 端口。
完成应用开发后,可通过执行流水线任务实现应用的构建发布。

# 服务注册与发现
下文将基于 Spring Cloud 和 Erda 的注册中心开发服务接口的注册与发现。
# echo service
Erda 的注册中心基于 Nacos 实现(具体请参见 使用 Nacos 云服务),需在 pom.xml 文件中添加 Nacos 依赖:
        <dependency>
            <groupId>com.alibaba.cloud</groupId>
            <artifactId>spring-cloud-starter-alibaba-nacos-discovery</artifactId>
            <version>2.1.0.RELEASE</version>
        </dependency>
同时在 src/main/resources/application.yml 配置注册中心:
```
spring:
  application.name: echo-service
  cloud:
    nacos:
      discovery:
        server-addr: ${NACOS_ADDRESS:127.0.0.1:8848}
        namespace: ${NACOS_TENANT_ID:}
```
提示
application.name 需与代码中保持一致。
io.terminus.erda.bestpractice.echo.Application 类增加 @EnableDiscoveryClient 注解表明此应用需开启服务注册与发现功能。
```
package io.terminus.erda.bestpractice.echo;

@SpringBootApplication
@EnableDiscoveryClient
public class Application {
    public static void main(String[] args) {
        SpringApplication.run(Application.class, args);
    }
}
```
开发 io.terminus.erda.bestpractice.echo.controller.EchoController 类,并实现功能 API:
package io.terminus.erda.bestpractice.echo.controller;

import org.springframework.web.bind.annotation.RequestBody;
import org.springframework.web.bind.annotation.RequestMapping;
import org.springframework.web.bind.annotation.RequestMethod;
import org.springframework.web.bind.annotation.RestController;

class Content {
    public String content;

    public void setContent(String content) {
        this.content = content;
    }

    public String getContent() {
        return content;
    }
}

@RestController
@RequestMapping(value = "/echo/content")
public class EchoController {
    private String c = "";

    @RequestMapping(method = RequestMethod.PUT)
    public void echoPut(@RequestBody Content content) {
        c = content.content;
    }

    @RequestMapping(method = RequestMethod.POST)
    public void echoPost(@RequestBody Content content) {
        if (c != content.content) {
            c = content.content;
        }
    }

    @RequestMapping(method = RequestMethod.DELETE)
    public void echoDelete() {
        c = "";
    }

    @RequestMapping(method = RequestMethod.GET)
    public String echoGet() {
        return c;
    }
}
# echo web
pom.xml 和 application.yml 参考 echo service 部分。
创建 echo service 的接口类 io.terminus.erda.bestpractice.echo.controller.EchoService:
package io.terminus.erda.bestpractice.echo.controller;

import org.springframework.cloud.openfeign.FeignClient;
import org.springframework.web.bind.annotation.RequestBody;
import org.springframework.web.bind.annotation.RequestMapping;
import org.springframework.web.bind.annotation.RequestMethod;

@FeignClient(name="echo-service")
@RequestMapping(value = "/echo")
public interface EchoService {
    @RequestMapping(value = "/content", method = RequestMethod.PUT)
    void echoPut(@RequestBody Content content);

    @RequestMapping(value = "/content", method = RequestMethod.POST)
    void echoPost(@RequestBody Content content);

    @RequestMapping(value = "/content", method = RequestMethod.GET)
    String echoGet();

    @RequestMapping(value = "/content", method = RequestMethod.DELETE)
    void echoDelete();
}
在 io.terminus.erda.bestpractice.echo.controller.EchoController 实现对资源 content 的增删改查:
@RestController
@RequestMapping(value = "/api")
public class EchoController {
    @Autowired
    private EchoService echoService;

    @RequestMapping(value = "/content", method = RequestMethod.PUT)
    public void echoPut(@RequestBody Content content) {
        echoService.echoPut(content);
    }

    @RequestMapping(value = "/content", method = RequestMethod.POST)
    public void echoPost(@RequestBody Content content) {
        echoService.echoPost(content);
    }

    @RequestMapping(value = "/content", method = RequestMethod.GET)
    public Content echoGet() {
        Content content = new Content();
        String c = echoService.echoGet();
        content.setContent(c);
        return content;
    }

    @RequestMapping(value = "/content", method = RequestMethod.DELETE)
    public void echoDelete () {
        echoService.echoDelete();
    }

    @RequestMapping(value = "/healthy", method = RequestMethod.GET)
    public Boolean health() {
        return true;
    }
}

class Content {
    private String content;

    public void setContent(String content) {
        this.content = content;
    }

    public String getContent() {
        return content;
    }
}
# dice.yml
编辑 echo-web 和 echo-service 两个应用的 dice.yml,增加 Addon 注册中心。

完成以上代码后,再次执行 echo-web 和 echo-service 的流水线,随后即可在 环境部署 看到 注册中心。
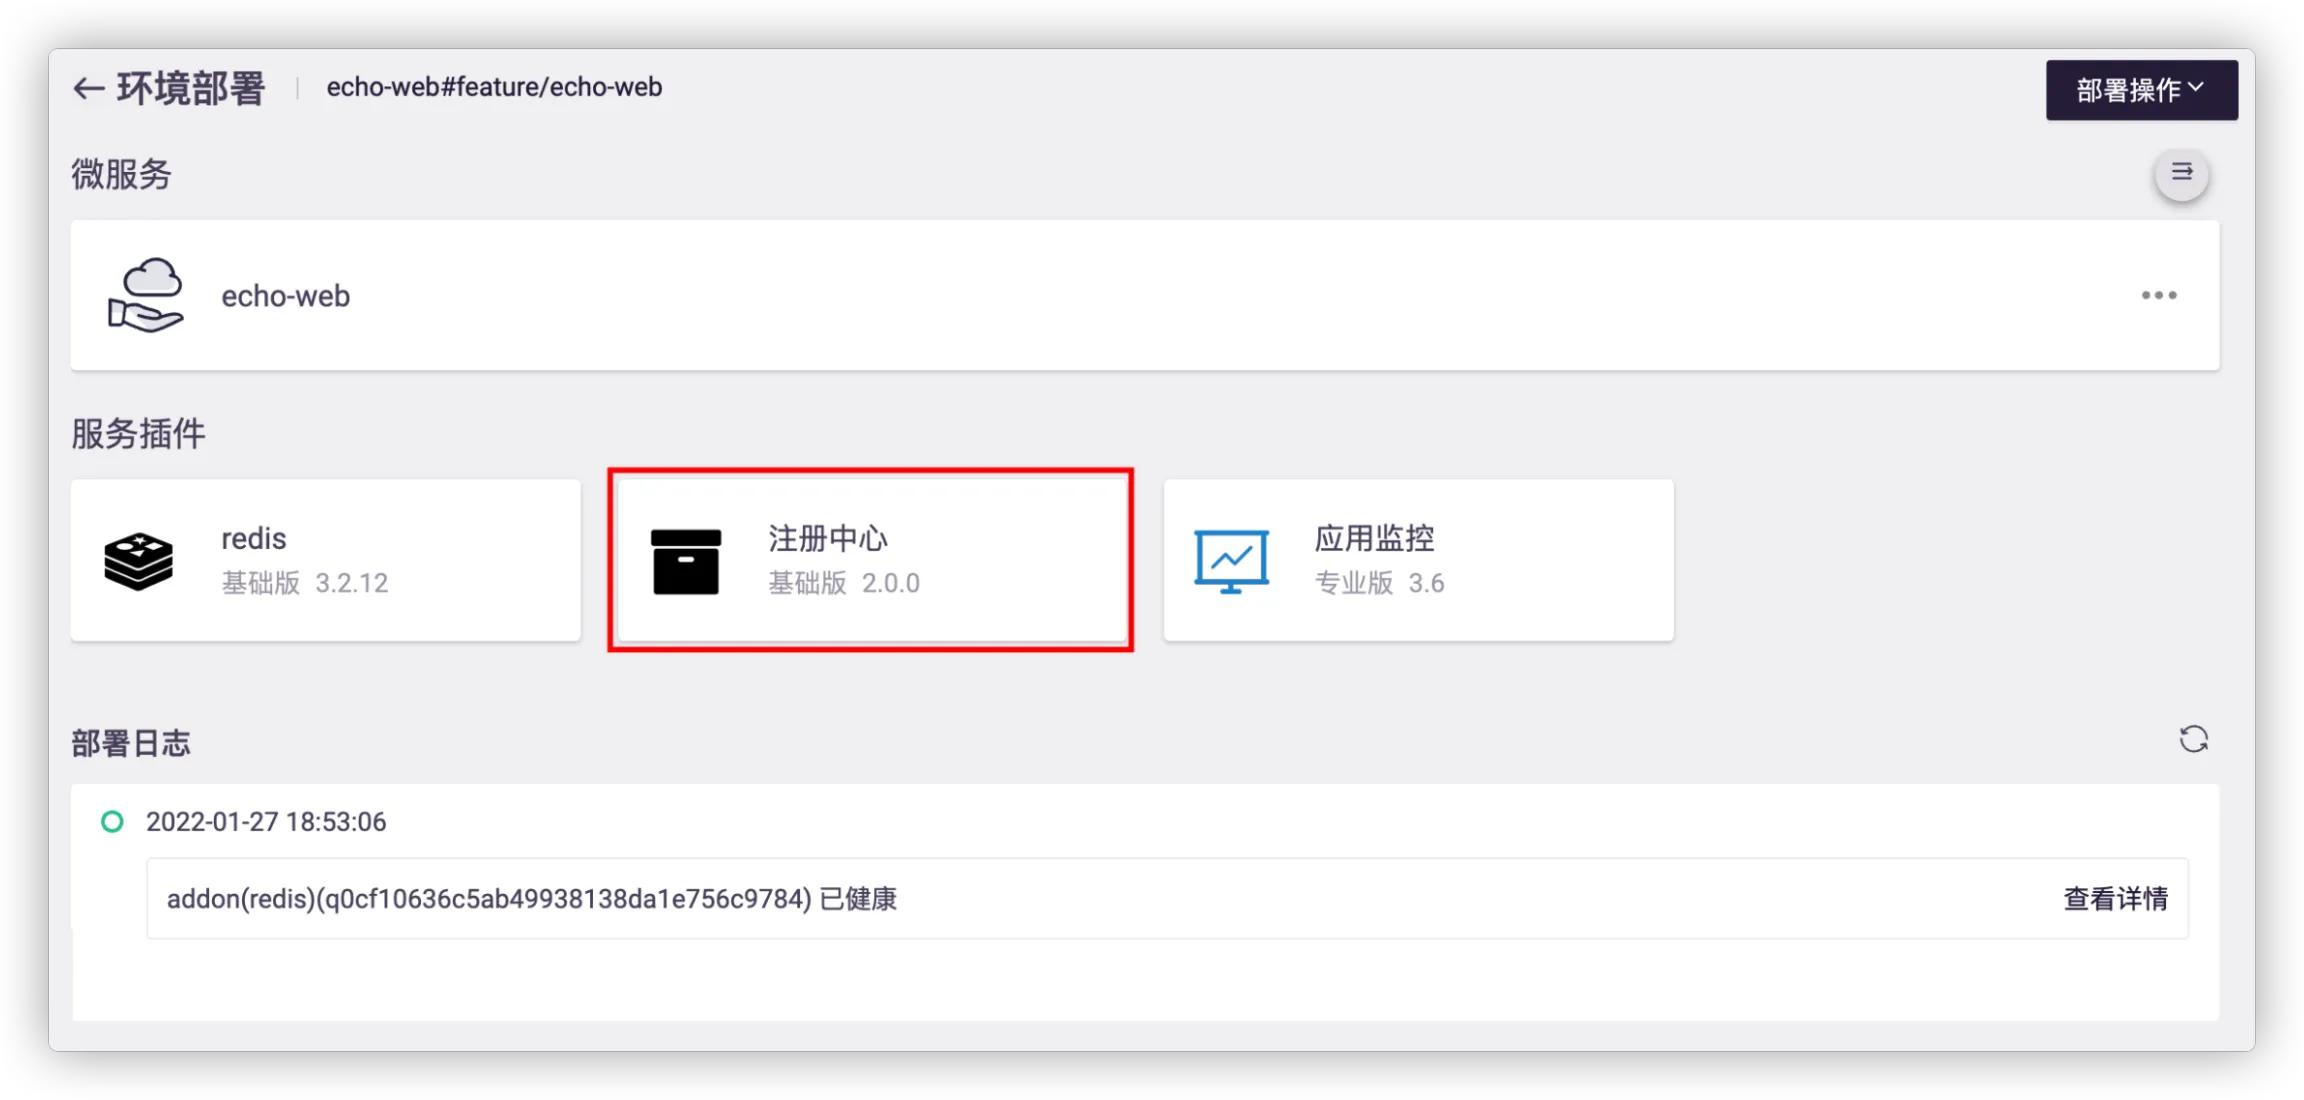
点击 注册中心,或进入 微服务治理平台 > 服务治理 > 注册中心,查看 HTTP 协议。

echo-service 和 echo-web 已分别完成服务的注册和发现。
# API 访问测试
# 关联应用
进入 DevOps 平台 > API 管理 > API 集市,点击 echo 应用 API 的 管理 选项。
- 关联关系:选择项目名称为 bestpractice,应用名称为 echo-web。
- 版本管理:选择服务名称为 echo-web,部署分支未 feature/echo-web,关联实例为 echo-web-xxx.svc.cluster.local:8080。

提示
- 应用下可包含多个服务,本示例中应用名称与服务名称均为 echo-web,仅是一种同名的情况。
- 关联实例是一个 VIP 域名地址(Kubernetes Service 域名地址),由于服务可部署多个 Pod 实例,Erda 通过 Kubernetes 的 Service 实现对多个 Pod 的负载分配。
# 创建管理条目
进入 DevOps 平台 > API 管理 > 访问管理,创建管理条目。
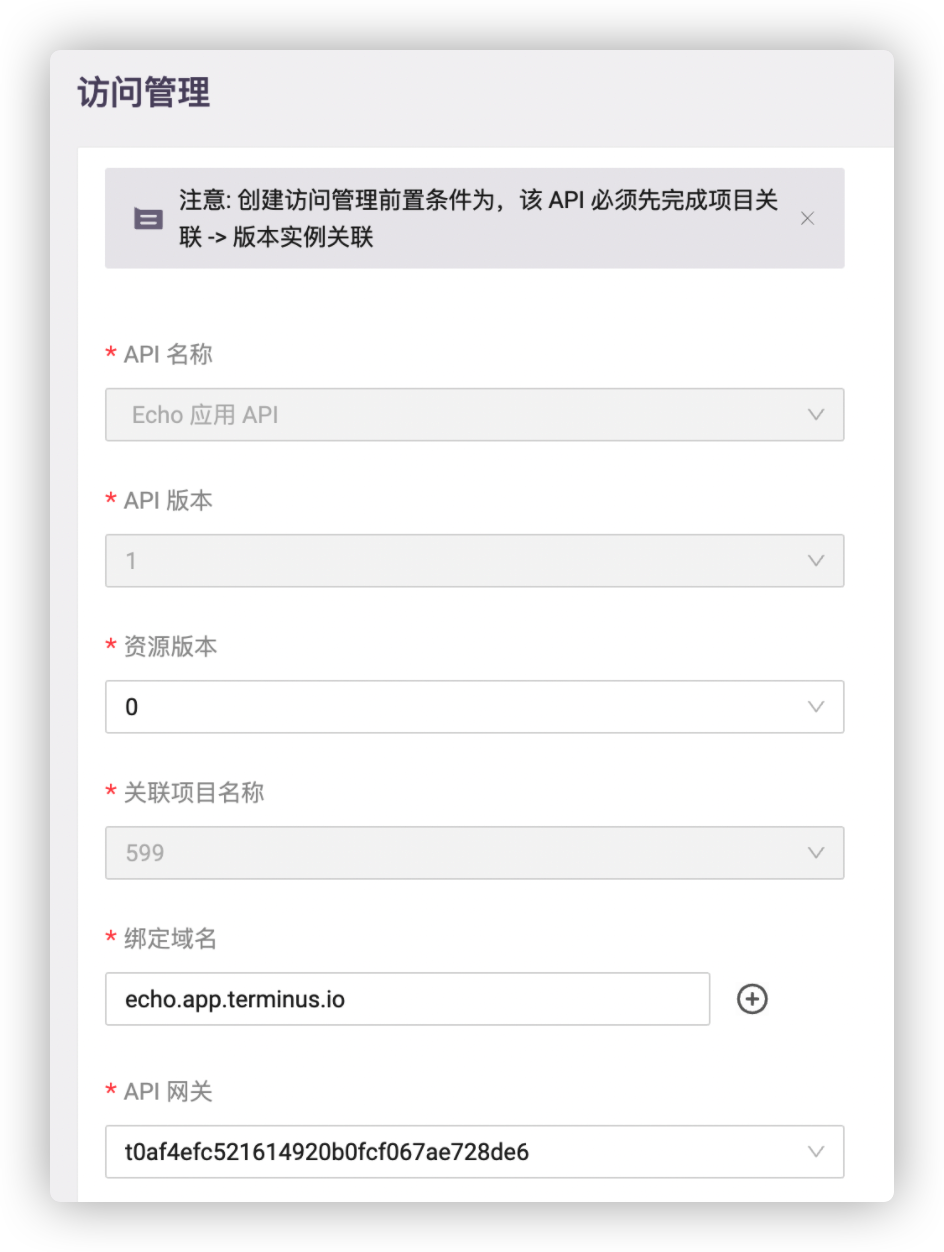
提示
- 绑定域名 需绑定已解析到 Erda 平台的公网入口 IP 方可从公网访问服务。
- 若尚未创建 API 网关,请根据提示先行创建 API 网关。
# 申请调用并测试
进入 DevOps 平台 > API 管理 > API 集市 > Echo 应用 API > 申请调用。若无合适的客户端,请根据提示先行完成创建。保存系统提示的 Client ID 和 Client Secret,用于后续测试。
完成审批后进入 API 集市 > Echo 应用 API > 认证,输入 ClientID 和 ClientSecret 后可选择任意 API 并点击测试。

# 配置中心使用
# echo service 应用配置热加载
在 pom.xml 文件中增加依赖:
<dependency>
    <groupId>io.terminus.common</groupId>
    <artifactId>terminus-spring-boot-starter-configcenter</artifactId>
    <version>2.1.0.RELEASE</version>
</dependency>
提示
需使用端点二次开发的 Spring Boot Starter 适配 Erda 平台。
io.terminus.erda.bestpractice.echo.controller.ErrorController 增加 slowTime 变量模拟耗时请求,并通过配置中心实现配置热加载:
@RefreshScope
@RestController
@RequestMapping(value = "/echo/error")
public class ErrorController {
    @Value("${echo.slowtime:100}")
    private int slowTime;

    @RequestMapping(method = RequestMethod.POST)
    void errorGet(@RequestBody EchoError err) throws Exception {
        if (err.getType().equals("slow")) {
            Thread.sleep(slowTime);
        }
        else {
            throw new Exception("make exception");
        }
    }
}
其中注解 @RefreshScope 和 @Value 实现配置 echo.slowtime 热加载。
在 dice.yml 的 Addon 部分增加配置中心:

# echo web 增加 API
编辑 io.terminus.erda.bestpractice.echo.controller.ErrorController 类,实现 /api/error API:
@RefreshScope
@RestController
@RequestMapping(value = "/echo/error")
public class ErrorController {
    @Value("${echo.slowtime:300}")
    private int slowTime;

    @RequestMapping(method = RequestMethod.POST)
    void errorPost(@RequestBody EchoError err) throws Exception {
        if (err.getType().equals("slow")) {
            Thread.sleep(slowTime);
        }
        else {
            throw new Exception("make exception");
        }
    }
}

class EchoError {
    private String type;

    public void setType(String type) {
        this.type = type;
    }

    public String getType() {
        return type;
    }
}
# 验证
再次执行两个应用的工作流完成更新部署。
在 echo-service 应用的 环境部署 点击 配置中心,或进入 微服务治理平台 > 服务治理 > 配置中心,设置 echo.slowtime 的值:
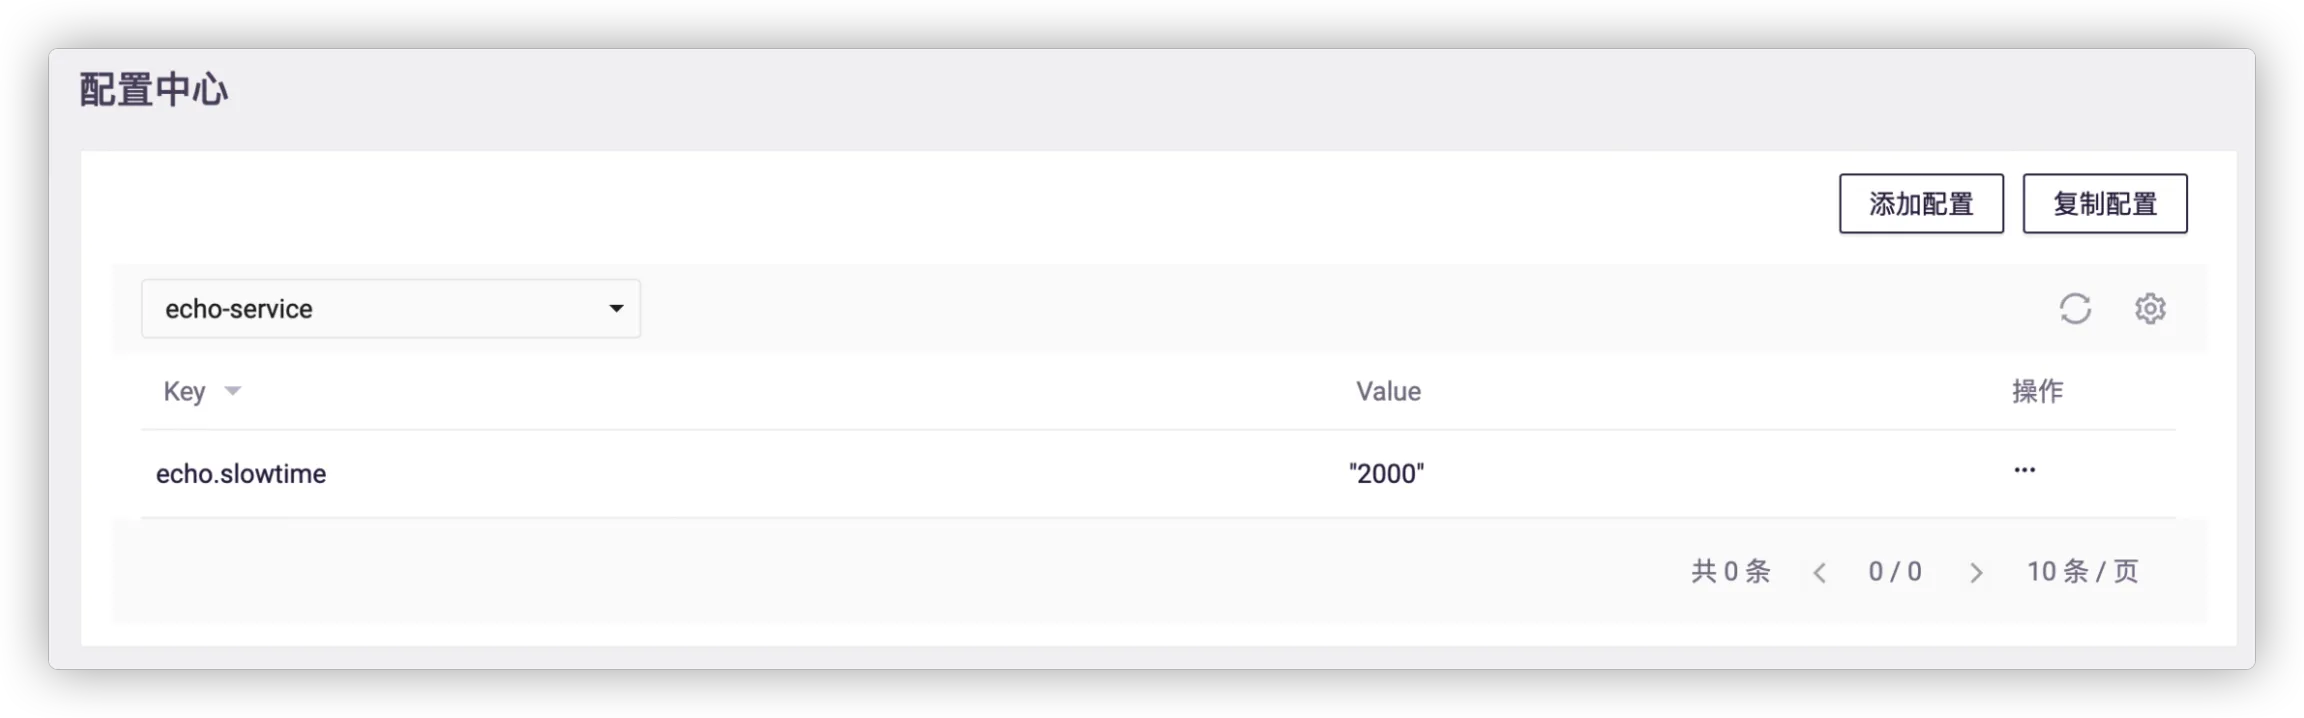
可逐步从小到大进行设置(例如 500、1000、1500),每次配置将被热加载实时生效,随后可在 API 测试界面上调用 /api/error API 进行访问。
# 服务治理
# 前提条件
为实践服务治理,需先制造一些请求和异常。
- 调用 /api/contnet 接口实现对资源的增删改查。
- 设置 echo.slowtime 设置为 1500 后,调用 /api/error 接口且 type=slow 的情况接口模拟超时。
- 调用 /api/error 接口且 type=exception 的情况接口模拟异常。
提示
由于 Feign 调用默认使用 Ribbon进行负载均衡,且 Ribbon 的默认超时时间为 1 秒,因此 echo.slowtime 设置超过 1 秒时接口可以模拟超时。
# 平台治理
进入 微服务治理平台 > 服务总览 > 拓扑,查看项目的微服务全景图,其中异常情况已用红色标明。

进入 监控中心 > 服务监控 > 链路查询,选择 链路状态 为 错误,可查看异常链路的信息。

由上图可以看出,echo-service 的 /echo/error 接口耗时 500+ 毫秒导致慢请求。
更多相关信息,请参见 服务分析。
至此,您已通过一个 echo 微服务项目实践了 Erda 上的 Spring Cloud 开发。整个过程涉及到微服务组件(注册中心、配置中心)的使用、CI/CD 工作流、API 设计和测试、服务异常观测等,本文中仅点到为止,详细使用请参见各平台的使用指南。